
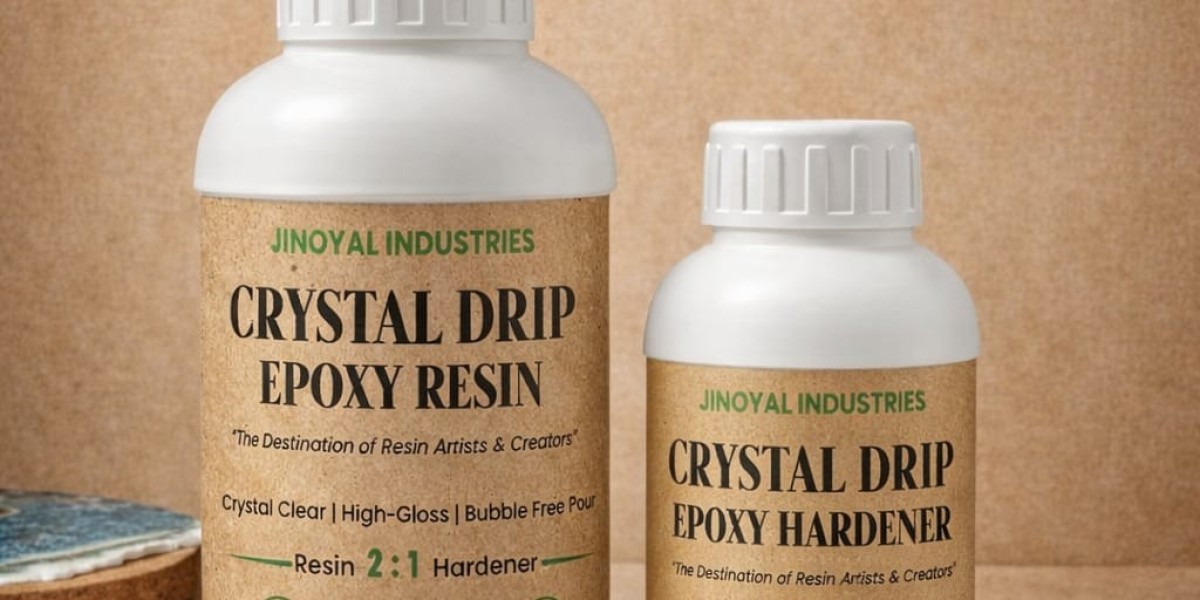
How to Choose the Right Resin and Hardener for Creative Projects

Epoxy resin has opened up countless possibilities for artists, craft enthusiasts, DIY creators, and handmade businesses. From colorful coasters and decorative trays to jewelry, keychains, clocks, and artistic panels, resin can transform simple ideas into attractive finished products.
At the center of every epoxy project are two important components: Resin and Hardener . These components work together through a chemical reaction that transforms the liquid mixture into a solid material.
Choosing the right resin system is important because different products can have different working times, curing characteristics, recommended applications, mixing ratios, and pouring requirements.
This guide explains how to select and use resin and hardener, what to consider before starting a project, and how to avoid common problems during the resin-making process.
Understanding Resin and Hardener
An epoxy system generally contains two components:
Epoxy Resin
Epoxy Resin Hardener
The resin provides the primary material, while the hardener initiates the curing reaction.
When the two components are combined according to the manufacturer's instructions, they gradually transform from a liquid mixture into a solid material.
The exact properties depend on the specific resin system.
Why Choosing the Right Resin System Matters
Not every epoxy resin is designed for exactly the same application.
Before purchasing a product, consider:
Project type
Desired finish
Working time
Curing requirements
Recommended pour depth
Mixing ratio
Environmental conditions
Compatibility with pigments
Choosing a product according to the intended application can make the creative process more predictable.
Resin and Hardener for Different Projects
Different resin projects may require different characteristics.
Resin Coasters
Coasters typically require a resin system suitable for casting relatively shallow decorative pieces.
Resin Jewelry
Jewelry projects often benefit from a resin that works well with small molds and detailed designs.
Decorative Trays
Larger trays require attention to the manufacturer's recommended pouring thickness and curing conditions.
Resin Clocks
Clock projects may involve larger surfaces and decorative layers, making proper planning important.
Keychains
Keychains generally use smaller molds and can be customized with pigments, glitter, and decorative elements.
How to Select Epoxy Resin for Beginners
If you are new to resin art, start by identifying the type of project you want to make.
Look for product information that clearly explains:
Mixing ratio
Working time
Curing time
Recommended pour depth
Suitable applications
Storage conditions
Safety instructions
A clearly documented product can make it easier for beginners to follow the correct process.
Understanding Mixing Ratios
The mixing ratio is one of the most important instructions provided with an epoxy system.
Some systems may use a particular ratio by weight, while others may specify a ratio by volume.
Never assume that one resin system uses the same ratio as another.
Always follow the manufacturer's instructions for the specific product.
Incorrect ratios can cause:
Soft resin
Sticky surfaces
Incomplete curing
Uneven results
Reduced performance
Accurate measurement is therefore essential.
Step-by-Step Resin and Hardener Mixing Guide
Step 1: Prepare the Workspace
Use a clean, stable, and suitable workspace.
Keep all required materials within reach before mixing.
Step 2: Read the Instructions
Check the resin manufacturer's recommended ratio, working conditions, and curing instructions.
Step 3: Measure the Components
Measure resin and hardener accurately.
Step 4: Combine Them
Place both components into a clean mixing container.
Step 5: Mix Thoroughly
Stir slowly and consistently.
Scrape the sides and bottom of the container to help incorporate both components.
Step 6: Add Compatible Pigments
Once the resin and hardener have been properly combined, add suitable pigments gradually.
Step 7: Pour
Transfer the mixture into the selected mold.
Step 8: Cure
Allow the piece to cure according to the manufacturer's instructions.
Why Mixing Technique Matters
The quality of mixing can influence the final result.
Incomplete mixing may leave areas with different proportions of resin and hardener.
This can lead to inconsistent curing.
At the same time, extremely aggressive mixing can introduce unnecessary air into the mixture.
A controlled and thorough mixing technique is therefore important.
Choosing the Right Pigments for Resin
Once resin and hardener have been mixed properly, creators can use compatible colorants and decorative materials.
Different products provide different effects.
Mica Powder
Ideal for rich colors and shimmer.
Metal Pigment
Useful for metallic-looking effects.
Glow in the Dark Powder
Designed to provide a luminous effect in suitable applications.
Chameleon Flakes
Used for color-changing decorative effects.
Glitter for Resin
Adds sparkle and decorative highlights.
The amount of pigment should be controlled according to the resin manufacturer's recommendations.
Creating a Marble Resin Effect
Marble effects can be created by combining contrasting resin colors.
For example:
White + Silver
can create a modern marble appearance.
Cream + Gold
can produce a warm decorative style.
Black + Copper
can create a dramatic appearance.
The key is to maintain separation between the colors instead of mixing everything together.
Creating Ocean-Inspired Resin Art
Ocean-themed resin art is another popular creative application.
A project can combine:
Blue Mica Powder
Turquoise resin
White accents
Fine Glitter for Resin
Transparent resin
The colors can be layered to create the appearance of water and waves.
Metallic pigment can also be added as a small accent.
Creating Geode Resin Art
Geode artwork combines multiple colors and decorative elements.
A typical project may include:
Base resin color
Contrasting resin
Mica Powder
Metal Pigment
Glitter
Decorative stones or suitable inclusions
The resin and hardener provide the base material, while the additional components create the visual design.
Resin and Hardener with Glow Powder
Compatible Glow in the Dark Powder can be used to create luminous resin projects.
Some ideas include:
Galaxy coasters
Glow keychains
Night-themed artwork
Decorative ornaments
Custom signs
A dark background can create stronger visual contrast for glowing details.
Resin and Hardener with Chameleon Flakes
Chameleon Flakes can introduce a color-shifting effect.
They can be particularly attractive in:
Jewelry
Keychains
Coasters
Decorative trays
Abstract artwork
Combining chameleon flakes with a dark resin background can help highlight their reflective appearance.
Resin and Hardener with Metal Pigment
Metal Pigment can be used to create metallic effects.
Popular combinations include:
Gold and black
Silver and white
Copper and blue
Bronze and green
Rose gold and pink
Metallic pigments can be used as the main color or as decorative accents.
Resin and Hardener with Glitter
Suitable glitter can add sparkle to epoxy resin.
For example:
Gold glitter with gold pigment
Silver glitter with blue resin
Holographic glitter with purple resin
Iridescent glitter with white resin
Use glitter selectively to keep the overall design balanced.
How to Improve Resin Clarity
For projects where a clear finish is important, follow the manufacturer's recommendations carefully.
Good practices include:
Measure accurately
Mix thoroughly
Avoid unnecessary air incorporation
Use suitable pigments
Keep the workspace clean
Follow recommended curing conditions
The resin's own formulation also plays a major role in its final appearance.
Troubleshooting Sticky Resin
A sticky or soft surface can have several possible causes.
Common possibilities include:
Incorrect resin-to-hardener ratio
Incomplete mixing
Insufficient curing time
Unsuitable temperature
Product-specific curing conditions
Before attempting to fix the project, check the manufacturer's troubleshooting guidance for the specific resin system.
Troubleshooting Uneven Curing
Uneven curing can occur when the mixture is not properly proportioned or mixed.
To reduce the possibility:
Measure accurately.
Mix thoroughly.
Scrape the container sides.
Follow the manufacturer's recommended conditions.
Avoid guessing the mixing ratio.
Keeping a consistent process is particularly important for repeated production.
Managing Bubbles in Resin
Air bubbles can appear during mixing and pouring.
To reduce unnecessary bubbles:
Stir slowly.
Avoid whipping the mixture.
Pour carefully.
Follow the resin manufacturer's recommended bubble-removal technique.
Avoid unnecessary movement after pouring.
Different resin systems may have different bubble-management recommendations.
Understanding Curing Time
Curing time varies from one resin system to another.
Factors that may influence curing include:
Product formulation
Temperature
Humidity
Layer thickness
Mixing ratio
Project size
A resin may become firm before it reaches its final properties, so always follow the manufacturer's stated curing schedule.
Resin and Hardener for DIY Craft Kits
Epoxy resin systems are commonly included in DIY craft kits because they can be combined with molds and decorative materials.
A basic resin craft kit may contain:
Epoxy Resin
Epoxy Resin Hardener
Silicone Mold
Mica Powder
Glitter
Mixing Cups
Stirring Sticks
Suitable Protective Equipment
The exact contents depend on the kit.
Resin and Hardener for Handmade Businesses
For handmade businesses, selecting a consistent resin system is especially important.
Products may include:
Coasters
Trays
Keychains
Jewelry
Clocks
Decorative panels
Personalized gifts
Using the same resin system across a product collection can make production and quality control easier.
Artists can then create variations by changing:
Mold design
Mica colors
Metallic pigments
Glitter
Chameleon flakes
Glow pigments
How to Store Resin and Hardener
Storage conditions can affect product quality.
Follow the manufacturer's storage instructions and generally keep containers:
Properly sealed
In a suitable cool and dry location
Away from direct sunlight
Away from contamination
Clearly labeled
Do not leave containers open unnecessarily.
Safety Considerations
Always read the safety documentation supplied with the specific resin and hardener.
Good general practices include:


